Creating a Database
Video Summary
Covered in this section:
- Starting your Database
- Creating a Table
- Creating a Calculated Field
- Formatting a Database
- Sorting records
- Searching for records
It is important that you understand the following definitions before you begin working with databases.
- A field is one part of the information related to an entity. For example, you might have a name field, or a date
field, or a field to hold a person's social insurance number. All of these fields relate to the entity
person.
- A record is a collection of fields. For example, an employee record contains all of the information you have about the employee.
- A database is the collection of records containing all the information in the database.
Access Database Definitions
There are several different "views" available in Access database processing.
 Datasheet View allows you to enter information into your
database. It is in a table format similar to Excel.
Datasheet View allows you to enter information into your
database. It is in a table format similar to Excel.  Design View allows you to setup and edit the fields of
your database.
Design View allows you to setup and edit the fields of
your database.
Starting your Database
To open MS Access, open the Microsoft Office folder that is located on your desktop. Inside you will find an icon that looks like this:
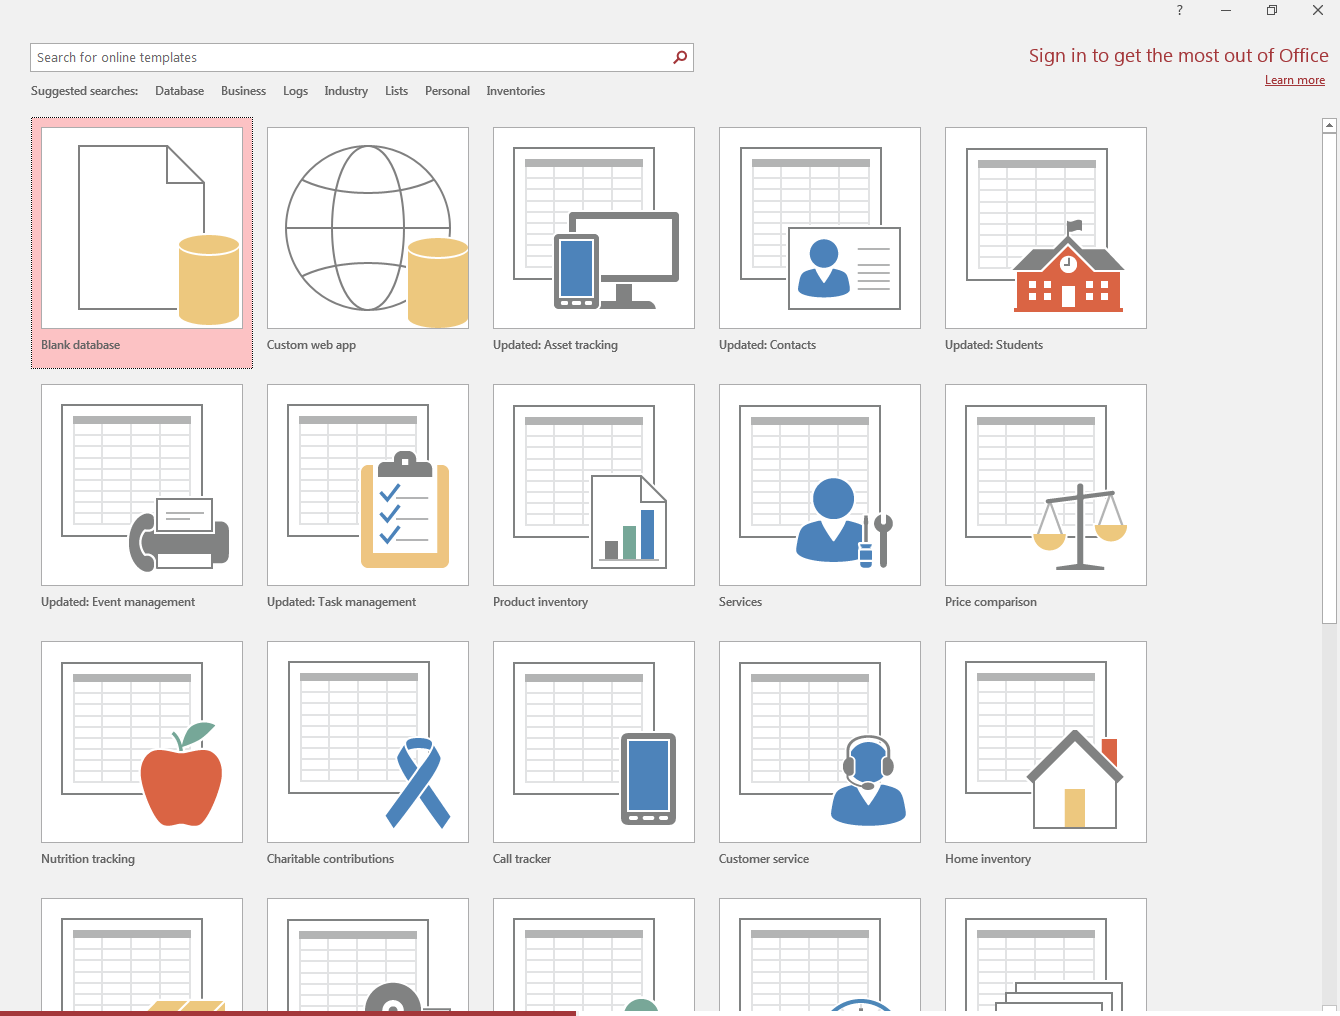
Double Click on this icon and the following window will pop up. If the icon is not on the desktop you can also find it by clicking on the Start button, then All Programs, MS Office, Access.
This window gives you three options:
- Blank Access database allows you to start a brand new database.
- Available Templates, This gives a good interface to start a new database with pre-named fields and pre-made forms, and reports
- Open an existing file allows you to open an existing Access database. This is the bar on the left side of the screen.
Exercise:
Open a blank database and take a look at all the features. Remember to name your database in the text box that pops up. Otherwise your database will be named database1.
Creating a Table
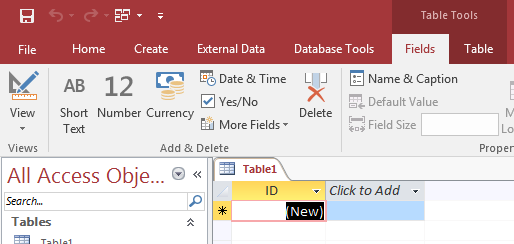
The database window displayed here contains your first table, as well as your list of objects (this means tables, reports, queries, ect). At the top of that page in the left corner you will notice a button labelled view. If you click the arrow underneath it you will find the option design view. Right now in the Objects bar on the left hand side Tables is selected. The other sections on the left are the tasks you can perform on Tables. The only tasks we will be concerned with are Queries, Forms and Reports.
Click on Design view to start inserting the fields for our database.
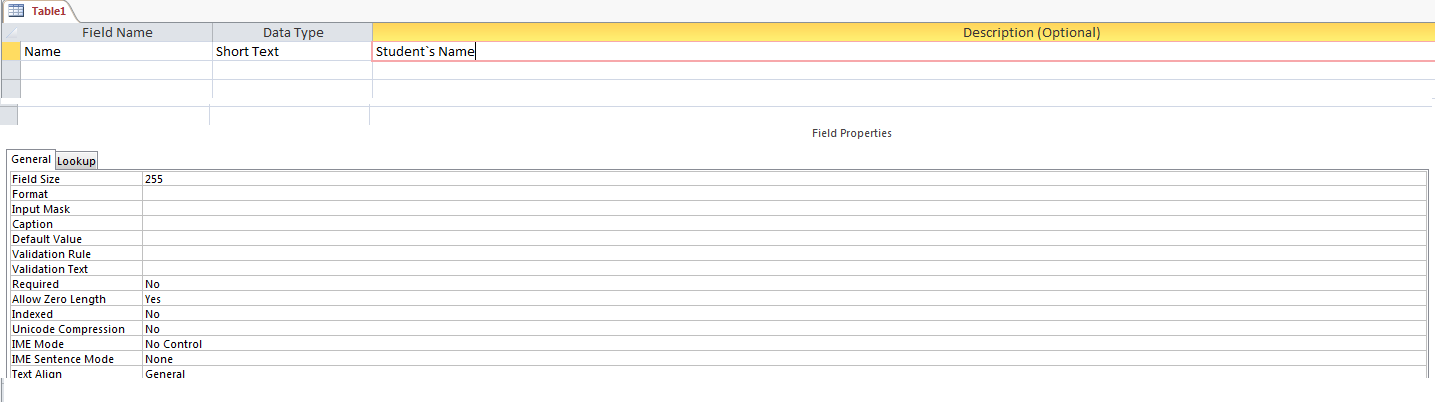
This window allows you to insert the field names and type of data fields it will contain. This example shows a Name field to contain the names of students for this database. The names of students are text so the Name field will contain Short Text for Data Type. To view other data types click on the down arrow to the drop down menu options.
You may notice on your own table that there is a symbol that looks like
 This is the Primary Key. What it does is make that field have no repeating
entries. At the moment we don't want to deal with that so right click on the symbol and press the Primary Key option. This
will turn it off for now.
This is the Primary Key. What it does is make that field have no repeating
entries. At the moment we don't want to deal with that so right click on the symbol and press the Primary Key option. This
will turn it off for now.
The lower left part of this window allows you to set up additional options associated with the fields.
*Note: Field names are entered in vertically not horizontally like Works Database.
Exercise:
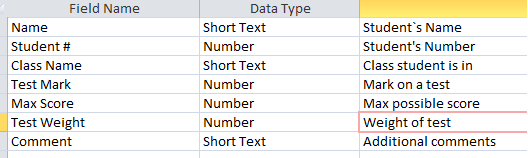
Create a table with the following fields:
- Name - Data Type: Text
- Student # - Data Type: Number
- Class Name - Data Type: Text
- Test Mark - Data Type: Number
- Max Score - Data Type: Number
- Test Weight - Data Type: Number
- Comment - Data Type: Text
Creating a Calculated Field
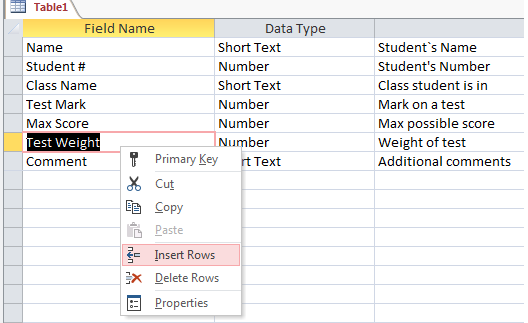
You should now have 7 fields that look like this.
Your next step would be to right click on the field "Test Weight" and click the Insert Rows option.
In this new Row Type in Test Grade. Then click on the "Data Type" for the field and select Calculated. This will bring up a prompt that looks like this.
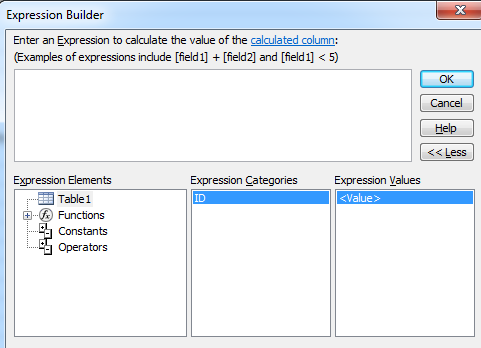
To make the calculation all you have to do is state the field names that you want in your calculations in square brakets and then the appropriate operations inbetween them such as
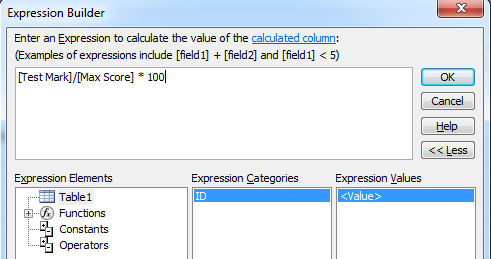
([Test Mark]/[Max Score])*100
Your end Results should look like this.
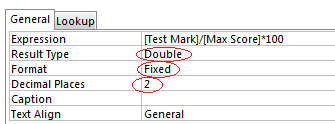
The next step after you press the OK button is to edit the properties of your calculated field.The field Properties are at the bottom of the screen
For our example at the top you are going to change the Format to "Fixed" and the Decimal Places to "2" What this will do is round all answers that this field gets to two decimal places. It is important to note that if the Format is not "Fixed" then the Decimal Places section will do nothing.
Another field property that you are going to have to change is the Result Type. This will need to change to "Double". The reason for this is that our calculations involve decimal numbers. In computers there are several different types of numbers. The ones that you will most likely use are the Integer and Double. Integers are whole numbers and Doubles are decimal numbers. The computer calculates these two types of numbers in completly different ways. This is important to know becuse when working with numbers such as we are now getting accurate results when calculating is important. One tip that is helpfull when dealing with numbers is to not mix your data types. To see what kind of number your Number fields are click on the data type and look at field size.
Note that Single is the same as Double but it is smaller. It is used to save space in the computers memory.
When you are done the Field Properties should look like this
Exercise:
- Your next step would be to follow the above instructions for Weighted Marks which goes before Comments.
- The formula for Weighted Marks is ([Test Grade]*[Test Weight])/100.
When you are done you should have the following fields
- Name - Data Type: Text
- Student # - Data Type: Number
- Class Name - Data Type: Text
- Test Mark - Data Type: Number
- Max Score - Data Type: Number
- Test Grade - Data Type: Calculated
- Test Weight - Data Type: Number
- Weighted Marks - Data Type: Calculated
- Comment - Data Type: Text