Introduction to C++
Video Summary: https://youtu.be/87U_VwvJzo4
In this course, you will learn to write in a programming language named c++. When starting new projects, be sure to select c++, and not similar languages like c or c#, as these languages behave very differently.
Creating Your First C++ Program
| A console mode application is a character based program that runs in a text-based input/output window. |
For your first C++ program, you will build a console mode application that asks for your name and then displays a greeting message. This (i.e. a console mode application) is the kind of program that you will build for all your lab and class exercises/assignments because console mode programs are often simpler to build than GUI or Windowed applications.
While this course will mostly use Replit, you may want to download a desktop program in case there are network outages. There are video instructions for downloading various IDEs and creating the correct program type for various IDEs in URCourses. We have included links to those videos here, set to start at the timecode for creating a console application. You can ignore any File I/O instructions you see in the video for now.
- Recommended for Lab and Lecture: replit.com
- Windows 10 Industry Standard (Community Version): Visual Studio Community 2019
- macOS Industry Standard: XCode
- Windows alternative: Code::Blocks
The Code
When you come to the part where you are ready to put C++ code in your project, type this code into the C++ editor:
Make sure you type it... it's important to get used to fixing typing mistakes while you work.
Save hello.cpp after you have finished editing it.
Building the hello Project
In order to compile any code in an IDE, you have to create a project. A project holds three major types of information:
-
Source code files (.cpp) - The files that contain the code to create an executable file and run your program.
In this simple example, the file
hello.cppwill be the only source code file, but in larger applications you often break the code up into several different files to make it easier to understand (and also to make it possible for several people to work on it simultaneously). The project maintains a list of the different source files and compiles all of them as necessary each time you want to create a new executable. - Compiler and linker options particular to this specific application. For example, it remembers which libraries to link into the executable, whether or not you want to use pre-compiled headers, and so on.
- The type of project you wish to build: a console application, a windows application, etc.
For now we create a very simple project "hello" and use it to compile hello.cpp.
Compile and Build:
- Compile
Some IDEs allow you to compile your code as a separate step. This simply compiles the source code in one file like hello.cpp and forms an object file (hello.obj or hello.o) for it. It does not perform a link or create an executable, so it is useful only for quickly compiling a file to check for errors.
Here's how you can compile the file hello.cpp in a few C++ IDEs:- In replit --> g++ is the compiler. Type a command like this in the Console panel:
You can then run the resulting executable by typing something like this afterward:g++ -Wall code_file.cpp -o output_name
For our hello example that's:./output_nameg++ -Wall hello.cpp -o hello ./hello - In Visual Studio, select Build --> Compile from the main menu.
- In XCode, select Product --> Perform Action -- > Compile "hello.cpp" from the main
menu.
- In Code::Blocks, select Build --> Compile current file from the main menu.
- In replit --> g++ is the compiler. Type a command like this in the Console panel:
- Build
In replit, you will see a Run ► button.
The Run button does a more complex compile than the one we typed above. It uses the most recent C++ and adds some features. You don't need them. Replit's Run button will also compile and build a program out of ALL the .cpp files in the Files panel.
Important: In labs 2 to 10 you put all your .cpp for multiple exercises into one repl - Run won't like this. You will have to compile and run separately. We will remind you how in Lab 2.
In other IDE's the same menu that has Compile will also have a Build option.
Like replit's Run button, build compiles all of the source files in the project that have been modified since the last build, and then links them to create an executable file.
Tip: A C++ project or repl can only Build successfully if there's only one main() function in all the files present.
- Auto Compile/Build/Run
For single one program repls and IDE projects, you won't usualy need to compile or build as a separate step. Usually it is good enough to just run the program.
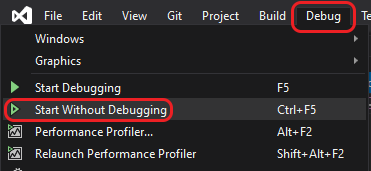
Beginners using Visual Studio, especially older version, you should be careful to choose Debug --> Start Without Debugging to run the program.
When you run in most IDEs, a window will pop up. If errors or warnings are displayed in the Build status window, there is probably an error in the source file. Often, you can double click on these to be taken to the error. Check your source file again for missing semicolons, quotes, or braces or for spelling mistakes and so on.
XCode and replit are a little different. Watch the videos to see what to do!