Introduction to Visual C++
Visual C++ comes within Microsoft Visual Studio. Visual Studio also contains Visual Basic, Visual C#, and Visual J#. Using Visual Studio.NET, you can mix and match languages within one "solution". We will, however, focus on developing C++ code throughout these labs.
Creating Your First C++ Program
| A console mode application is a character based program that runs in a DOS window. |
For your first C++ program, you will build a console mode application that displays a greeting message. This (i.e. a console mode application) is the kind of Visual C++ programs that you will build for all your lab and class exercises/assignments.
Console mode programs are often simpler to build than Windows applications, and this example will take you through the steps of creating, building and executing a program in Visual C++. We will use the built-in code editor in Visual Studio to edit your code; then we will show you how to build and run your C++ programs.
How to start
You can double click on the Visual Studio 2019 icon
 on the desktop.
You can also click on the startup menu at the left bottom corner
on your window desktop, type Visual Studio 2019,
and then select Visual Studio 2019.
on the desktop.
You can also click on the startup menu at the left bottom corner
on your window desktop, type Visual Studio 2019,
and then select Visual Studio 2019.
Starting Your First Program
When it is open, you would see the Start Page that looks like this picture.
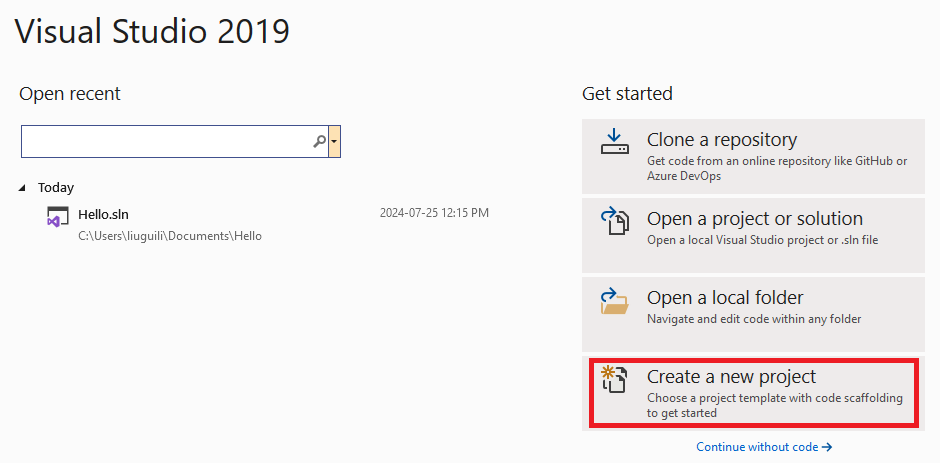
To open a new project, Click on the Create a new project directly on the screen, see the above picture.
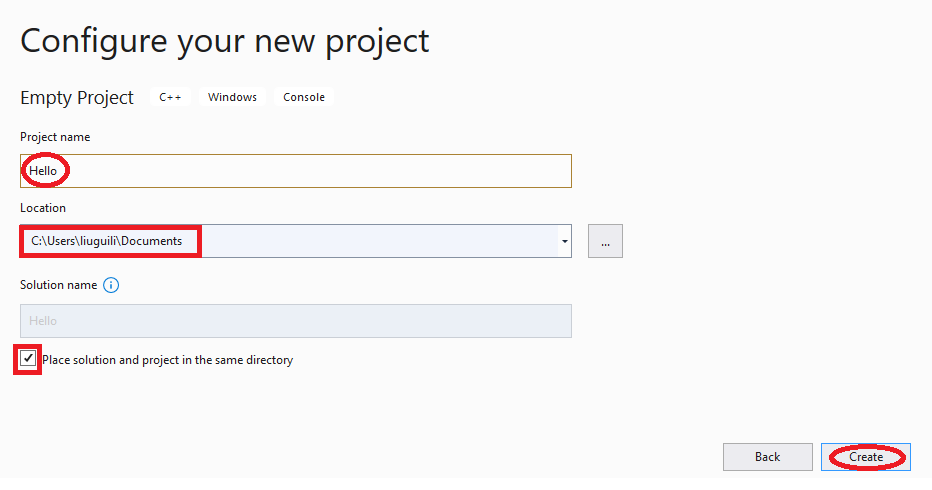
You will see the new project window:

Follow the following steps to complete the new project:
- For a "Name:", type a project name ("hello")
- "Location:", make sure it is in your Documents folder.
- Make sure that the box for "Place solution and project in the same directory" is checked.
- Click on "Create"
To add C++ source code to this project, do the following:
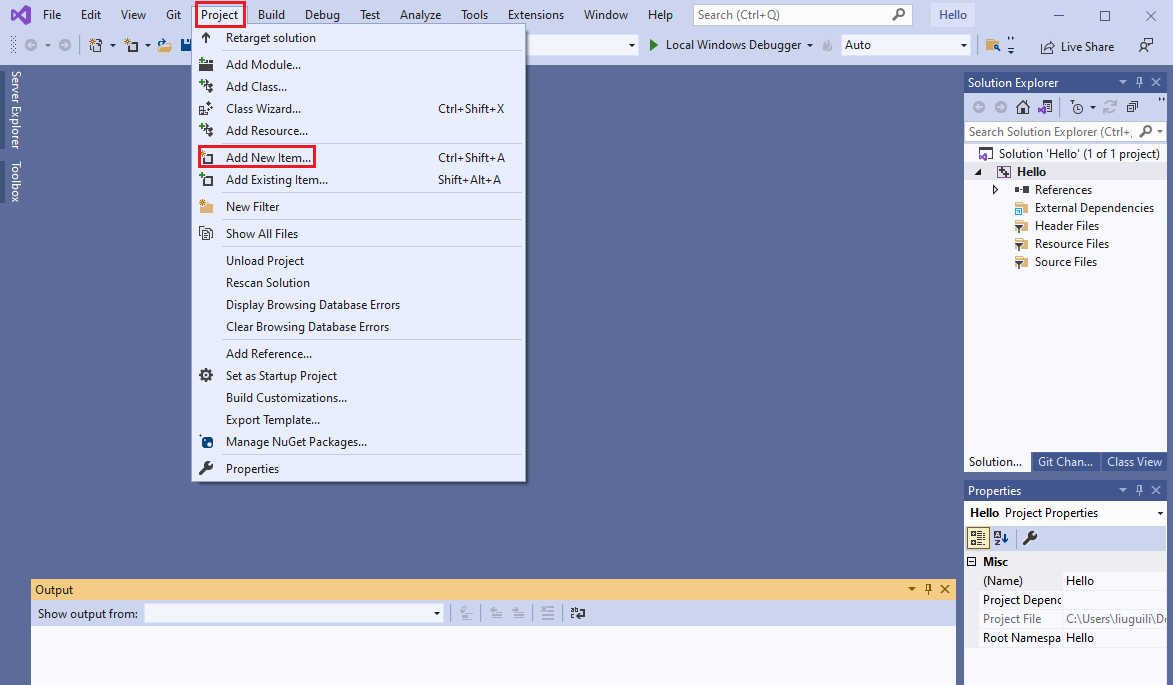
Select Project --> Add New Item... from the main menu,
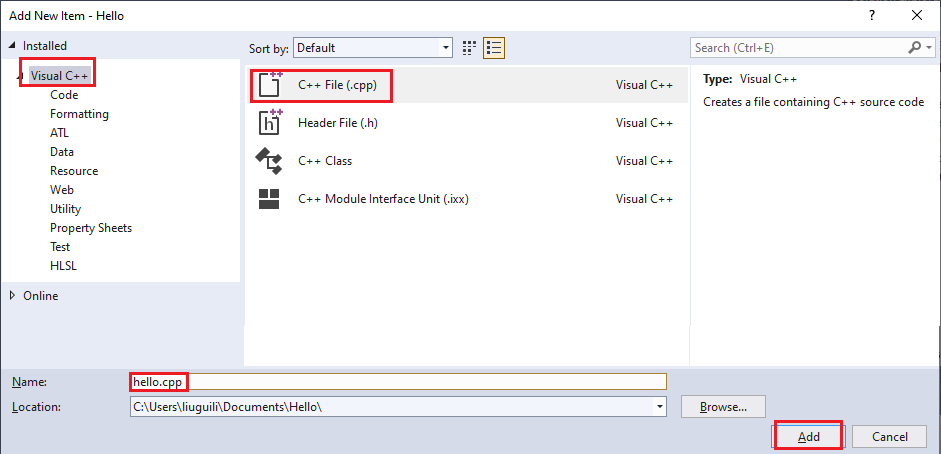
and select C++ File (.cpp) in the "Add New Item - Hello" section.
Type in the file name: "hello.cpp" in the Name: box.
Click on "Add".
This file will be added to the hello project work space that we have just created, and a blank document will be opened for editing. Please look at the following screen capture for you.
Type the following program in the source code editor:
// FILE:     hello.cpp
// PURPOSE:  An example of a simple I/O stream

#include <iostream>
#include <string>
using namespace std;

int main()
{
	string name;  //char name[50];

	cout << "Please enter your name" << endl;

	cin >> name;
	cout << "Hello, " << name << endl;
	return 0;
}
Save hello.cpp after you have finished editing it.
Building the hello Project
In order to compile any code in Visual C++, you have to create a project. A project holds three major types of information:
1) It remembers all of the source code files that combine together to create one executable. In this simple example, the file hello.cpp will be the only source code file, but in larger applications you often break the code up into several different files to make it easier to understand (and also to make it possible for several people to work on it simultaneously). The project maintains a list of the different source files and compiles all of them as necessary each time you want to create a new executable.
2) It remembers compiler and linker options particular to this specific application. For example, it remembers which libraries to link into the executable, whether or not you want to use pre-compiled headers, and so on.
3) It remembers what type of project you wish to build: a console application, a windows application, etc.
For now we create a very simple project "hello" and use it to compile hello.cpp.
Compile and Build:
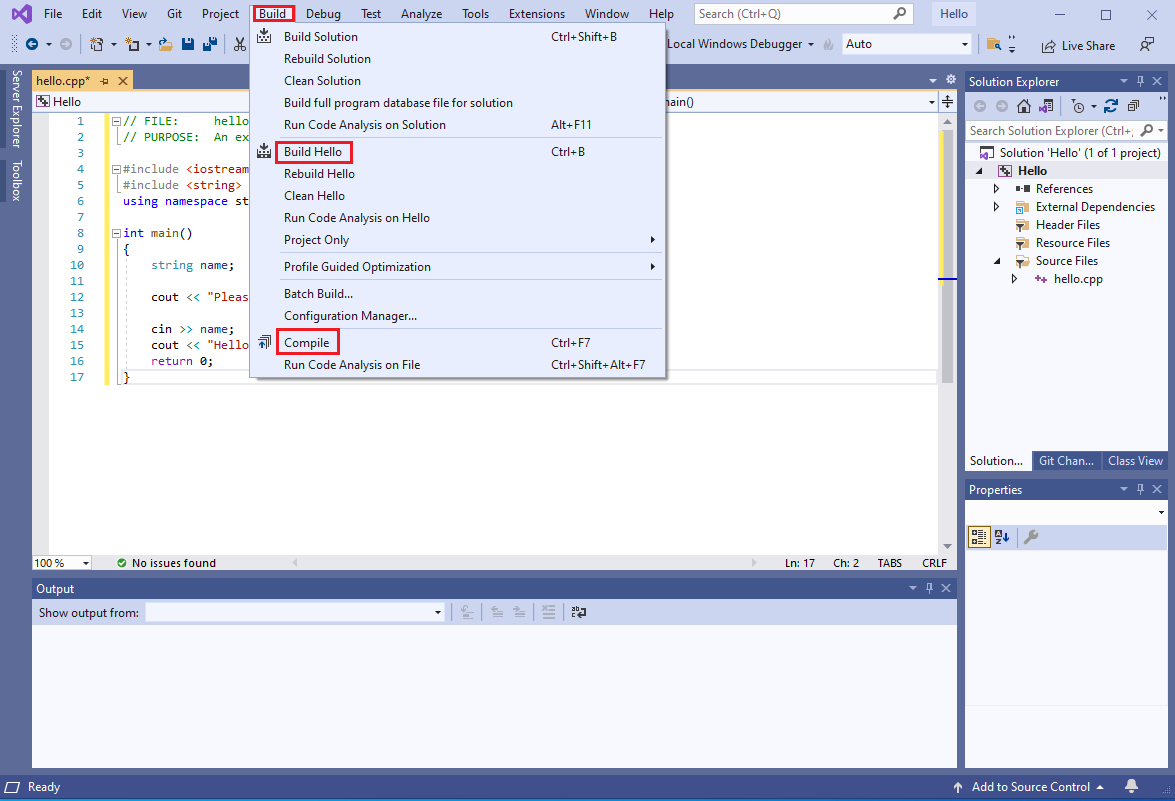
1. Compile the hello project by selecting Build -->
Compile from the main menu.
It simply compiles the source code in file hello.cpp and forms
the object file (hello.obj) for it. It does not perform a link,
so it is useful only for
quickly compiling a file to check for errors.
2. Select Build --> Build hello from the
menu bar to link the program.
It compiles all of the source files in the project that have been
modified since the last build, and then links them to create an
executable file.
3. Choose Debug --> Start Without Debugging to run the program.
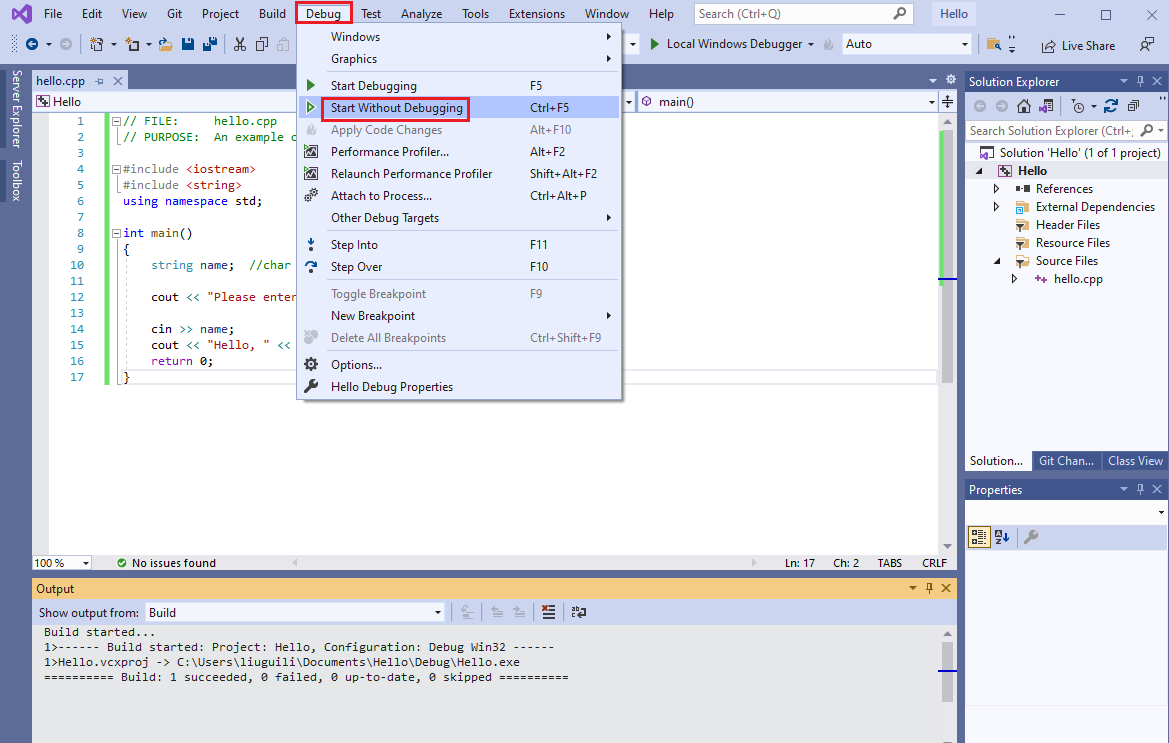
If errors or warnings are displayed in the Build status window, there is probably an error in the source file. Check your source file again for missing semicolons, quotes, or braces and so on.
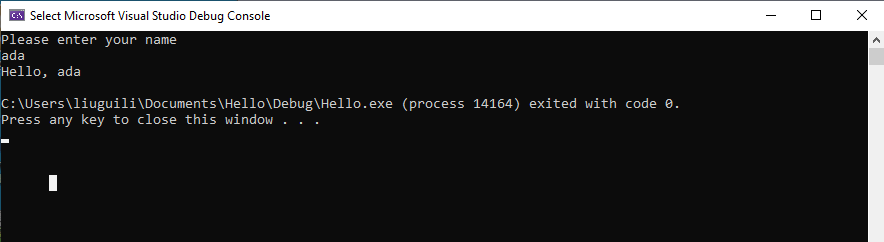
A DOS window will popup showing the program output.
Save Your C++ Programs On USB
In this lab, the Documents folder is not networked since networked folders don't work well with Visual C++.
To be sure you can use your files on another computer,
you can drag your project folder to a USB drive.
Example
- Step1. Create a folder called lab1 on your USB drive.
- Step2. Go to your Documents folder, copy the hello folder.
- Step3. Paste in the lab1 folder on your USB drive.
|
Thursday, 25-July-2024 17:18:13 CST |